 |
| Jug handle. |
List of items needed:
- Rexlace in 2 colours for a two toned jug handle (around £5 for a spool of 100yds) you will need at least 7 times the chosen length for your jug handle.
- Spare length of disused electrical lead (ie off an old broken appliance) around
- Electrical tape in a chosen colour.
- A horseshoe nail.
- Shoe lace or length of ribbon.
- scissors.
- tape or clamp.
- length of ribbon or raffia.

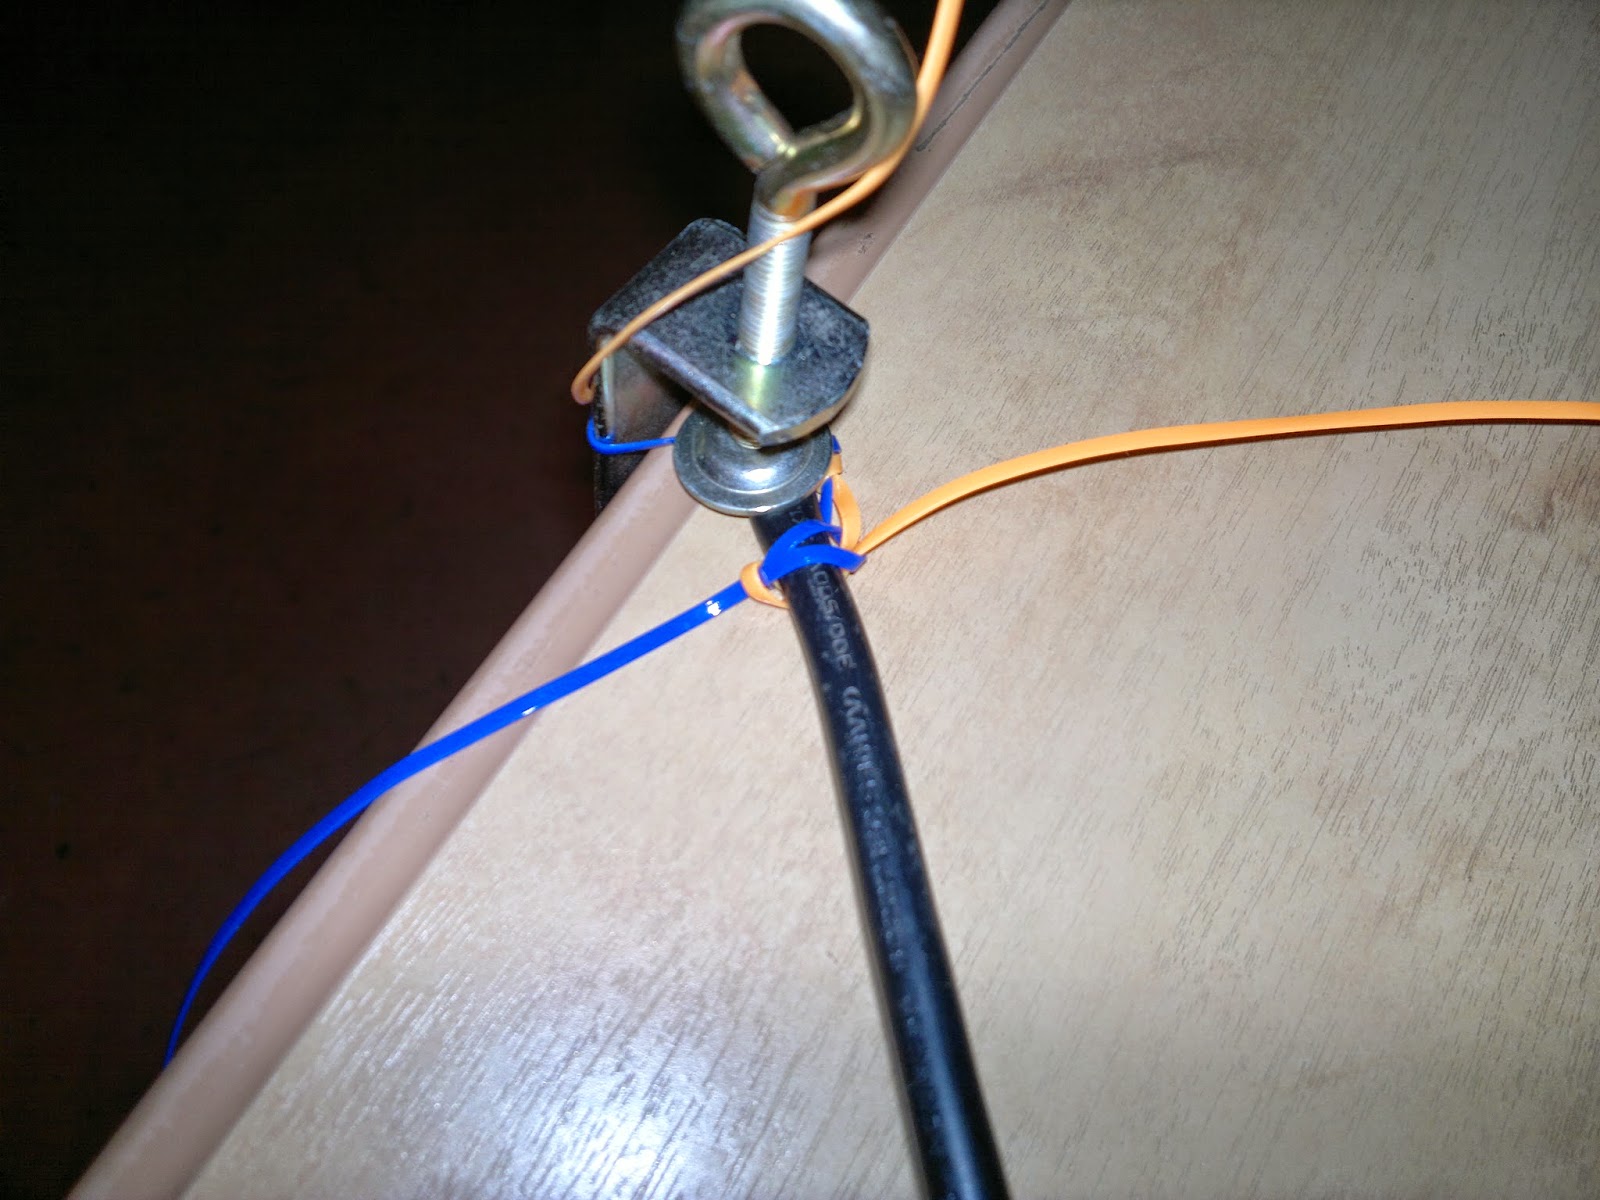
First tie a knot in the ends of the 2 pieces of rexlace Place in the middle the length of electrical lead and clamp or stick to the table. Here I used a knitting machine clamp but duct tape would work, just something to keep it in the same place.

To start the 'square knot' you need to first decide which colour you want down the middle on the outside of your jug handle. In this case we are using blue down the centre and orange on the outside. Put one colour on each side, it doesn't matter which side is which colour. Fold your centre colour over the cable in an 'L' shape (when on the other side will be a reversed 'L' shape but either way it folds over the cable). Put the outside colour (orange) over the tail of the centre colour as in the above picture.

Put the outside colour under the cable and then through the loop from the 'L' as above.

Pull tight so it looks like above. You need the Rexlace to lay flat so you may need to adjust until it is laying correctly, this way it will look right and overlap well down the cable.

Do the same again as in the first 4 steps starting with the centre colour this time in a reversed 'L' shape (or if you started this side an 'L' shape) put the outside colour over the tail under the cable and through the loop. No matter what side you are on you continue in this way all the way down using the same steps. Remember to lay the Rexlace flat by untwisting and adjusting every knot all the way down and to keep tightening, not so you stretch the Rexlace but just so it is tight.
After the 2nd knot.

Still going with the same knot!

When you have reached long enough for your desired size of jug handle (bend it to the right shape occasionally and see if its about right, there's no specified size but they are always smaller than you think, really massive ones wouldn't stay in the tail bun and would be too heavy). When you reach the desired length just tie to two ends together around the back. This will be where you place your nail so make it nice and tight. No one will see this area so it doesn't need to look perfect but just be neat so it doesn't cause a bulge.

Get together your electrical tape, scissors, farrier shoe nail and your length of square knotted cable.

Cut the rexlace from the reels leave a small tail. In the knot which will look something like above put your nail behind it so it looks like the picture below. It should stay in place nicely.


From here on in I have no photos, its impossible to tape and take photos! First start with your tape around the nail and knot then put the two ends together and tape around both ends.It will looks a bit like below, it will look a little scraggy at this time!

Pull the tape off about 2 inches but still on the roll and pierce with the nail. go around the middle. secure and cut tape then go around the ends again as before so it should look like this now. You may need to fiddle with your knots so they line up instead of being all over the place and push your jug hand into a jug handle shape!


To finish put a long boot lace through the middle of the jug handle so one end is on each side. Tape this down . Cover your taped area with a length or two of raffia, knotting occasionally so it is securely in place and crossing over the middle in a figure of 8. This not only covers the tape but secures the boot lace. I forgot to take a picture of the Royal and Orange one finished and sent it away before I remembered. Here is a picture though of a Blue and green one finished as an example.

Sorry for the delay in this post, it was due to be online last month but with a change of house and lack of internet everything has slowed down somewhat. I hope this series is of help to those out there who want to give it a go to try making their own flight set.
Coming soon in this series:
Part 3: Flights: The Shire mane roll.
Part 4: Flights: The Shire set extras, tail sprigs and ribbons.
Also to follow How to make Clydesdale standards and a series on plaiting!
No comments:
Post a Comment